Working with Callista Lists
Table of Contents
Overview
In many callista pages, a list of records display on initial entry to the page.
These lists can be filtered to make it easier to find the required record(s) and various actions can be performed on records in the list.
These lists may appear differently, and the selection of buttons on the toolbar vary, according to what is currently happening on the page.
Viewing Records
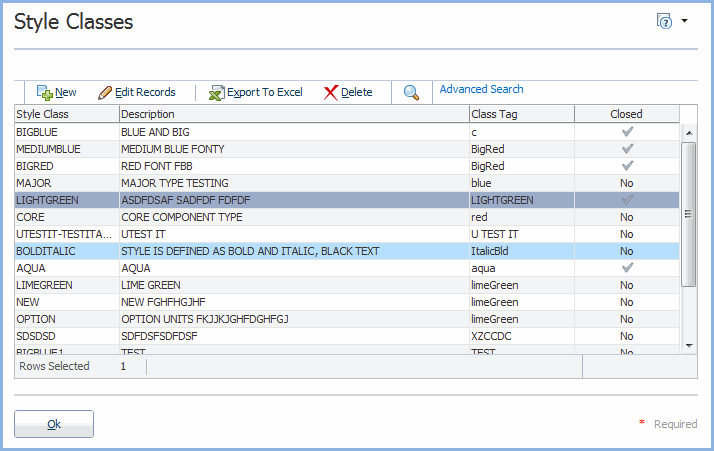
In some pages, upon entry, records may be displayed but not editable.
In the screen below, the record with the darker shading has been selected and the pale blue record currently has the cursor over it.
The Rows Selected message in the status bar at the bottom of the table tells us that there is currently only one record selected.
a) To Sort the records:
- To sort the records, click on the ASC or DESC symbol that display when your mouse hovers next to column heading. This will sort the table according to the values in that column.
b) To Adjust column widths:
- Adjust the column widths by clicking and dragging the the column dividers at the top of the table.
c) To Reorder the columns:
- Select a column heading and drag and drop to arrange the columns in the desired order.
d) To Select Records:
- Left mouse click on a record to select it. Selected records are highlighted.
- (CTRL/mouse click) to select additional records.
- (CTRL/mouse click) to deselect selected records.
- Left mouse click on a record and then Shift/mouse click on another record to additionally select all the records in between.
- The Rows Selected message in the status bar is updated as records are selected or deselected.
e) To Export the records to an Excel spreadsheet:
- To export the displayed records to an Excel spreadsheet click on the Export to Excel.
- To export a selection of records from this table, select the records to be exported and then click on Export to Excel.
- Note that this functionality may not be available for all lists. Where it isn't available the button won't display in the toolbar.
f) To Delete a Record:
- Select the record you want to delete, then click on Delete.
- A message displays, asking you to confirm this deletion.
For this message, click on OK to confirm the deletion or Cancel to cancel this deletion.
- Note: Validations may prevent deletion.
Searching for Records
a) To Perform a Quick Search:
- Click on the
 icon.
icon.
- A Search field displays above each column. These can be used individually or in combination to search for a particular record.
- Enter text/make selections in the search field(s) and then press Enter.
- Any records which contain the search text in that field are returned.
- Note that wildcards are not required in this search field.
i.e. An entry of 'AL' will return records such as ALLEN and NATALIE and CRYSTAL.
- Note, if the field is left blank for a column, then no filtration is performed for that column.
b) To Perform an Advanced Search:
- Click on Advanced Search to display the Advanced Search fields and operators.
- These are the same operators as described in Selection Popups.
- Select operators and record values in the search fields and then click on the Search button to return the records which match those criteria.
- As above, wildcards are not required in these search fields.
- Click on the Reset button to display the full set of records once again.
- Click on the Add Fields to select additional fields to use in the Advanced Search.
Note that the same field can be used with multiple operators in the Advanced Search.
Click on the Red cross adjacent to an Advanced Search field to remove that field from the search list.
- Click on Hide Advanced Search to removed the Advanced Search fields.
Editing, Creating and Removing Records
In some pages the records can be edited directly on the page displayed on entry. An example of this is GENW0040 and the editing of such records is described here.
In other instances, a new page is opened to allow the editing of a record.
Values in one column link to another page where the record can be edited.
a) To Edit a Record
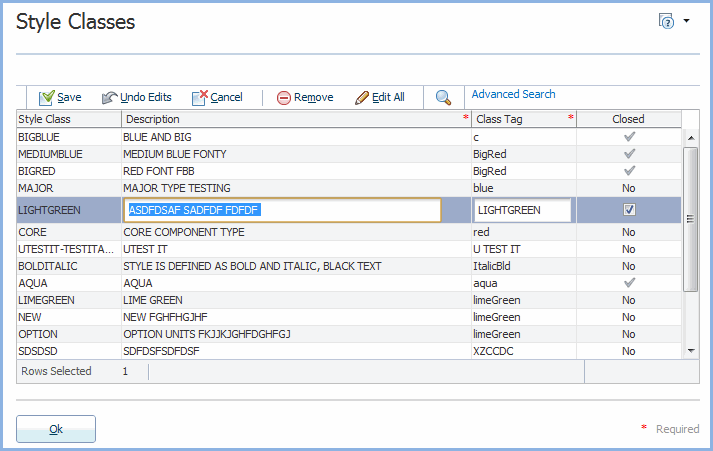
- Click on the Edit Records button.
- The selected record displays its editable fields as shown in the image below
Note that some fields such as Primary Keys are not editable after a record has been created.
Note also that Required fields can not be made blank.
- In edit mode you can make changes to one or more of the editable fields in the selected record.
- Note that if you mouse click on a field, values previously recorded for that field are displayed.
- To undo your changes (prior to saving them), but remain in Edit mode, click on the Undo Edits button.
- To cancel your editing session and go out of editing mode, click on the Cancel button.
- Note that a number of records can be selected and updated before the changes are saved.
- To save your changes, click on the Save button.
- A 'Changes have been saved.' message displays in the bottom right hand corner of the table.
- In Edit mode, the Remove button is available (rather than the Delete button)
- Click on this button to visually remove the selected record(s) from the list.
- The record(s) are deleted unless the Save button is clicked. If the Cancel button is clicked at this stage, the record is not deleted.
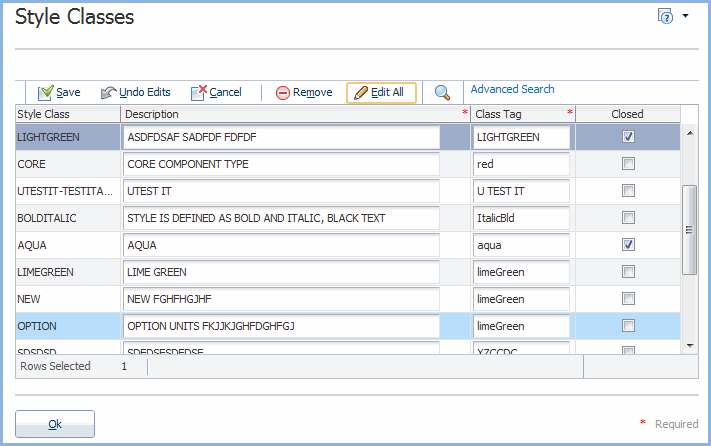
- In Edit mode the Edit All button is available
- Click on this record to make all displayed records editable. i.e. All records display their editable fields as shown below.
- This button can be used after a search has been performed and any displayed records can then be edited directly without having to select them first.
c) To Create a New Record
- Click on New.
- In most cases a New Record window is displayed as shown below.
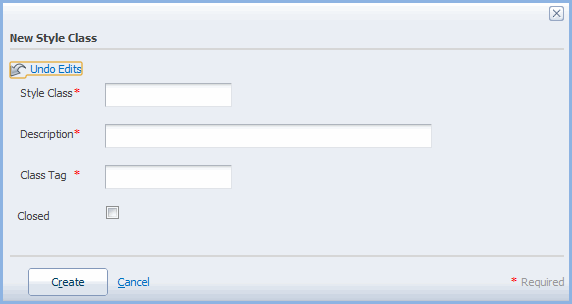
- Enter values in the fields displayed. For more information, refer to the field descriptions provided on the relevant help page.
Note that * Required fields must contain a value.
- To close this window without creating a new record click on Cancel.
- To start from scratch again, without closing the New Record window, click on the Undo Edits link.
- To create the new record, click on Create.
- In other cases a blank row becomes available in the list.
- In this case, values for the new record can be added directly and saved.
d) To Delete a Record
- Select the record to be deleted.
- Click on Delete. (Available when not in Edit mode).
- A message will display asking if you really wish to delete this record.
- Select OK to delete the record from the database or Cancel to keep it.
Last modified on
19 June, 2012 1:41 PM
History
Information
| Release Version |
Project |
Change to Document |
| 15.0 |
1722 - 11g Upgrade |
New Help page for 11g. |